Home Blog Page 9

How to Fix Common Flooring Problems: Scratches, Dents, and Stains

0

Flooring is a key element in the overall aesthetic and functionality of your home. However, over time, even the highest quality floors can experience problems such as scratches, dents, and stains. Addressing these issues promptly can help maintain the beauty and longevity of your flooring. In this article, we’ll explore effective methods for fixing common flooring problems, including scratches, dents, and stains, to keep your floors looking their best.

1. Fixing Scratches on Wood Floors

Wood floors can add elegance and warmth to your home, but they are susceptible to scratches from everyday wear and tear. Fortunately, many scratches can be repaired with simple techniques. Here’s how to fix them:

a. Minor Scratches

  • Clean the Area: Begin by cleaning the scratched area with a soft cloth and a wood floor cleaner to remove any dust or debris.
  • Apply a Wood Polish: Use a wood polish or scratch repair kit that matches the color of your floor. Apply it according to the manufacturer’s instructions, usually by rubbing it into the scratch with a soft cloth.
  • Buff the Surface: After applying the polish, buff the area with a clean cloth to blend the repair and restore the shine of the wood.

b. Deep Scratches

  • Clean and Sand: For deeper scratches, clean the area and lightly sand it with fine-grit sandpaper to remove any rough edges.
  • Fill the Scratch: Use a wood filler or putty that matches the color of your floor. Apply the filler with a putty knife, smoothing it flush with the surface.
  • Stain and Seal: Once the filler is dry, stain it to match the surrounding wood if necessary, and apply a clear polyurethane sealer to protect the repair and blend it with the rest of the floor.

2. Repairing Dents in Wood Flooring

Dents in wood flooring can be unsightly, but they can often be repaired without the need for replacement. Here’s how to tackle dents effectively:

a. Steam Method

  • Clean the Area: Clean the dented area thoroughly to remove any dust or debris.
  • Apply Moisture: Place a damp cloth over the dent and apply a hot iron on top of the cloth for a few seconds. The steam generated will help the wood fibers swell back into place.
  • Repeat if Necessary: If the dent is deep, you may need to repeat the process a few times. Once the wood has returned to its original shape, gently sand the area and apply a wood polish or finish to restore the surface.

b. Wood Filler Method

  • Clean and Fill: Clean the area and apply a wood filler that matches the floor color. Smooth it out with a putty knife and let it dry completely.
  • Sand and Finish: Once the filler is dry, sand the area to make it level with the surrounding wood. Apply a matching stain or finish to blend the repair with the rest of the floor.

3. Removing Stains from Wood Floors

Wood floors can be prone to stains from spills and accidents. To keep your floors looking pristine, follow these steps to tackle common stains:

a. Water Stains

  • Blot the Area: Blot the water stain with a dry cloth as soon as possible to absorb any excess moisture.
  • Apply a Wood Cleaner: Use a wood cleaner specifically designed for removing water stains. Apply the cleaner to the stained area, following the manufacturer’s instructions.
  • Buff the Surface: After cleaning, buff the area with a clean cloth to restore the wood’s shine.

b. Oil and Grease Stains

  • Clean the Area: Blot the stain with a dry cloth to absorb as much oil or grease as possible.
  • Use a Degreaser: Apply a degreasing agent or wood floor cleaner designed for oil stains. Follow the instructions and avoid over-saturating the wood.
  • Rinse and Dry: Rinse the area with a damp cloth and dry it thoroughly to prevent any damage to the wood.

c. Dark Stains

  • Apply Baking Soda Paste: For dark stains, make a paste using baking soda and water. Apply the paste to the stain and let it sit for a few minutes.
  • Scrub Gently: Gently scrub the area with a soft brush or cloth. Rinse with a damp cloth and dry the area completely.

4. Addressing Scratches and Dents in Laminate Flooring

Laminate flooring is known for its durability and affordability, but it’s not immune to scratches and dents. Here’s how to fix common problems:

a. Scratches

  • Clean the Surface: Start by cleaning the scratched area with a laminate floor cleaner to remove any dirt or debris.
  • Use a Laminate Repair Kit: Apply a laminate floor repair kit, which typically includes a color-matched wax or filler. Follow the instructions carefully to fill and blend the scratch.
  • Buff the Area: Once the repair is dry, buff the area with a soft cloth to restore the laminate’s shine.

b. Dents

  • Apply Heat: Use a hairdryer to apply heat to the dented area. This can help the laminate expand back into place. Be careful not to overheat the laminate.
  • Use a Laminate Repair Paste: For deeper dents, apply a laminate repair paste or filler. Smooth it with a putty knife and let it dry completely before sanding and buffing.

5. Dealing with Stains on Laminate Flooring

Laminate floors are resistant to stains, but spills and accidents can still occur. Here’s how to handle common stains:

a. Water Stains

  • Clean Immediately: Wipe up any water spills immediately to prevent staining.
  • Use a Damp Cloth: If a water stain does occur, clean it with a damp cloth and a mild laminate cleaner. Avoid excessive moisture, as laminate flooring can be damaged by water.

b. Food and Beverage Stains

  • Blot and Clean: Blot the stain with a dry cloth and clean the area with a laminate floor cleaner. For stubborn stains, use a mixture of vinegar and water.

6. Tackling Carpet Scratches, Dents, and Stains

Carpet is a popular flooring choice, but it can also suffer from scratches, dents, and stains. Here’s how to address these issues:

a. Scratches

  • Vacuum the Area: Vacuum the carpet to lift the fibers and remove any loose debris.
  • Use a Carpet Brush: Gently brush the scratched area with a carpet brush to restore the pile and blend the scratch.

b. Dents

  • Apply Steam: Place a damp cloth over the dented area and use a steam iron to apply heat. The steam will help lift the carpet fibers back into place.
  • Fluff the Carpet: After steaming, fluff the carpet fibers with your fingers or a carpet brush.

c. Stains

  • Blot the Stain: Blot the stain with a clean cloth to absorb as much liquid as possible.
  • Use Carpet Cleaner: Apply a carpet cleaner or a mixture of vinegar and water to the stain. Gently scrub with a soft brush and rinse with water.
  • Dry the Area: Blot the area with a dry cloth and allow it to air dry completely.

7. Preventative Measures

To minimize the occurrence of scratches, dents, and stains, consider implementing the following preventative measures:

  • Use Rugs and Mats: Place rugs and mats in high-traffic areas and under furniture to protect your flooring from scratches and dents.
  • Clean Spills Immediately: Address spills and stains as soon as they occur to prevent permanent damage.
  • Regular Maintenance: Perform regular maintenance, including cleaning and polishing, to keep your floors in good condition.

Conclusion

Maintaining your flooring in top condition involves addressing common issues like scratches, dents, and stains promptly and effectively. Whether you have wood, laminate, or carpet flooring, understanding the appropriate repair methods can help extend the life of your floors and keep them looking their best. By following these tips and techniques, you can tackle flooring problems with confidence and preserve the beauty and functionality of your home’s flooring.


The Environmental Impact of Your Roofing Choices

0

Choosing the right roofing material is not only crucial for the durability and appearance of your home but also has significant environmental implications. The environmental impact of roofing choices encompasses various factors, including energy efficiency, resource use, waste production, and overall sustainability. In this article, we’ll explore how different roofing materials affect the environment and offer insights on making eco-friendly choices that benefit both your home and the planet.

1. Understanding Roofing Material Types

Before delving into the environmental impact, it’s important to understand the types of roofing materials commonly used and their characteristics:

  • Asphalt Shingles: These are the most common roofing material, known for their affordability and ease of installation. However, they have a relatively short lifespan compared to other options and can contribute to landfill waste.
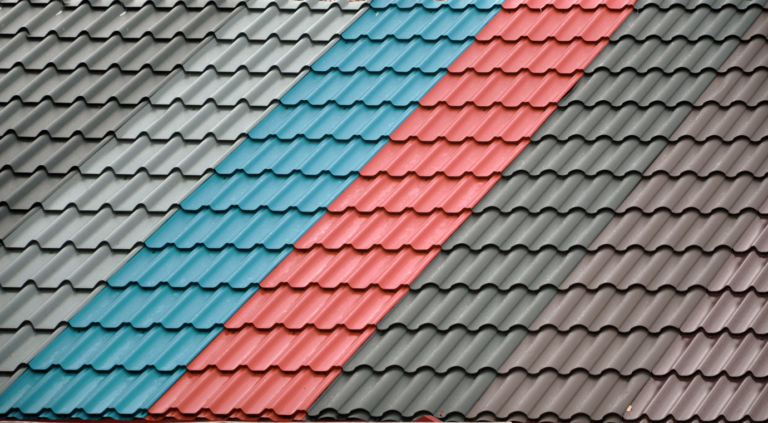
  • Metal Roofing: Made from materials like aluminum, steel, or copper, metal roofs are durable and energy-efficient. They are also recyclable, making them a more sustainable choice.
  • Clay and Concrete Tiles: These materials offer excellent durability and thermal performance. They are long-lasting and can be recycled, but their production process can be resource-intensive.
  • Wood Shingles and Shakes: Often chosen for their natural aesthetic, wood shingles and shakes have a renewable aspect but can be less durable and may require regular maintenance.
  • Slate Roofing: Slate is a highly durable and natural material with a long lifespan. However, the extraction and transportation of slate can have a high environmental impact.
  • Green Roofs: These living roofs are covered with vegetation, offering excellent insulation and reducing urban heat islands. They require a strong structural support and regular maintenance but provide significant environmental benefits.

2. Energy Efficiency and Insulation

The energy efficiency of roofing materials can greatly influence a home’s overall environmental impact. Roofing materials affect how much heat is retained or lost, which in turn impacts heating and cooling energy consumption. Here’s how different materials compare:

  • Reflective Roofs: Cool roofs, which include reflective or light-colored materials, can help reduce heat absorption. This decreases the need for air conditioning, leading to lower energy consumption and reduced greenhouse gas emissions.
  • Insulating Roofs: Materials with high insulating properties, such as certain types of metal and tile roofs, can help maintain consistent indoor temperatures, reducing the need for heating and cooling.

Choosing energy-efficient roofing materials can lower your home’s energy use, reduce utility bills, and minimize your carbon footprint.

3. Longevity and Durability

The longevity and durability of roofing materials directly impact their environmental footprint. Roofs with longer lifespans reduce the need for frequent replacements, which translates to less waste and fewer resources consumed over time. Consider the following:

  • Long-Lived Materials: Metal roofs, slate, and clay tiles are known for their durability and can last several decades or even a lifetime. This longevity means fewer materials are needed over time, reducing overall environmental impact.
  • Short-Lived Materials: Asphalt shingles typically have a shorter lifespan, often requiring replacement every 15-20 years. This can lead to increased waste and the need for more frequent resource extraction and production.

Opting for durable roofing materials can contribute to less frequent replacements, reducing the environmental impact associated with manufacturing and disposal.

4. Resource Use and Production Impact

The production of roofing materials involves various environmental impacts, including resource extraction, energy use, and emissions. Different materials have varying levels of resource intensity:

  • Resource Extraction: Materials like slate, clay, and metals require significant resource extraction, which can lead to habitat destruction and environmental degradation. Sustainable sourcing and recycling can help mitigate these impacts.
  • Energy Consumption: The manufacturing process for roofing materials can be energy-intensive. For example, the production of asphalt shingles and metal roofing involves considerable energy use, contributing to greenhouse gas emissions.
  • Sustainable Practices: Some manufacturers are adopting more sustainable practices, such as using recycled content, reducing emissions, and improving energy efficiency in production.

Choosing roofing materials from manufacturers with sustainable practices can help minimize the environmental impact associated with resource use and production.

5. Waste and End-of-Life Disposal

The end-of-life disposal of roofing materials is a critical aspect of their environmental impact. Consider how materials are managed at the end of their lifespan:

  • Recycling: Many roofing materials, such as metal and certain types of tiles, can be recycled. Recycling helps reduce waste and conserve resources by reusing materials rather than sending them to landfills.
  • Landfill Contribution: Materials like asphalt shingles and some types of wood shingles may not be easily recyclable and can contribute to landfill waste. Proper disposal and recycling programs are essential to managing this waste effectively.

Opting for recyclable materials or those with established disposal programs can reduce the environmental impact associated with roofing waste.

6. Impact on Urban Heat Islands

Urban heat islands (UHIs) occur when urban areas experience higher temperatures than their rural surroundings due to human activities and the concentration of heat-absorbing materials. Roofing choices play a role in UHI effects:

  • Reflective Roofs: Cool or reflective roofing materials help reduce heat absorption, mitigating the UHI effect and contributing to cooler urban environments.
  • Green Roofs: Living roofs with vegetation can significantly reduce UHI effects by providing natural cooling and improving air quality.

Choosing roofing materials that address or reduce UHI effects contributes to a more sustainable and comfortable urban environment.

7. The Benefits of Green Roofs

Green roofs, also known as living roofs, offer several environmental benefits that make them a unique and sustainable choice:

  • Insulation and Energy Efficiency: Green roofs provide excellent insulation, reducing the need for heating and cooling and improving energy efficiency.
  • Stormwater Management: They help manage stormwater runoff by absorbing rainwater and reducing the burden on drainage systems.
  • Biodiversity and Air Quality: Green roofs support urban biodiversity by providing habitat for plants and wildlife. They also help improve air quality by filtering pollutants.

While green roofs require a significant initial investment and structural support, their long-term environmental benefits make them a valuable option for sustainable building practices.

8. Choosing Eco-Friendly Roofing Materials

When selecting roofing materials with a lower environmental impact, consider the following factors:

  • Sustainable Sourcing: Look for materials that are sustainably sourced or produced with minimal environmental impact. Certifications such as Cradle to Cradle or Forest Stewardship Council (FSC) can indicate environmentally responsible practices.
  • Recycled Content: Choose materials with high recycled content, such as certain metal roofs or recycled asphalt shingles. This reduces the demand for virgin resources and supports recycling efforts.
  • Local Availability: Opt for locally sourced materials to reduce transportation emissions and support local economies.

By considering these factors, you can make more eco-friendly roofing choices that align with sustainable building practices.

9. The Role of Energy Star Ratings

Energy Star ratings can guide you in selecting roofing materials that offer superior energy efficiency. The Energy Star label indicates products that meet specific performance criteria for energy savings and environmental impact:

  • Reflective Roofing Products: Look for roofing materials with Energy Star ratings for reflective properties, which help reduce heat absorption and lower cooling costs.
  • Energy Efficiency: Energy Star-rated materials contribute to overall energy efficiency and can improve your home’s sustainability.

Choosing Energy Star-rated roofing materials ensures that you are selecting products that meet high standards for energy performance and environmental responsibility.

10. Making the Right Choice for Your Home

Ultimately, the best roofing choice for your home will depend on your specific needs, preferences, and environmental goals. Consider the following steps to make an informed decision:

  • Evaluate Your Priorities: Determine which factors are most important to you, such as energy efficiency, durability, or sustainability.
  • Consult Professionals: Work with roofing professionals who can provide expert advice and help you understand the environmental impact of different materials.
  • Research Options: Gather information on various roofing materials, their environmental benefits, and their suitability for your local climate and conditions.

By carefully evaluating your options and considering the environmental impact of your roofing choices, you can make a decision that benefits both your home and the planet.

Conclusion

The environmental impact of your roofing choices extends beyond aesthetic and functional considerations. By understanding the factors that influence sustainability, such as energy efficiency, durability, resource use, and waste management, you can make informed decisions that align with your environmental values. Whether you choose reflective materials, durable options, or green roofs, each choice contributes to reducing your carbon footprint and supporting sustainable building practices. Making thoughtful and eco-friendly roofing decisions helps create a more sustainable future for both your home and the environment.

How to Choose the Best Neighborhood for Your Family

0

Selecting the right neighborhood for your family is a crucial decision that can significantly impact your lifestyle, convenience, and overall well-being. The ideal neighborhood should cater to your family’s specific needs, preferences, and priorities. Whether you’re moving to a new city or simply seeking a better fit within your current location, understanding what factors to consider can help you make an informed choice. In this article, we’ll explore key considerations and tips for choosing the best neighborhood for your family.

1. Consider Your Budget

Your budget plays a fundamental role in determining which neighborhoods are suitable for your family. Understanding your financial limitations and goals can help narrow down your options and ensure you find a neighborhood that aligns with your financial situation. Here’s how to evaluate your budget effectively:

  • Determine Your Price Range: Research the average home prices in different neighborhoods to identify areas that fit within your budget. Consider additional costs such as property taxes, homeowners’ association fees, and maintenance expenses.
  • Assess Affordability: Ensure that the cost of living in a neighborhood is manageable within your household’s income. This includes evaluating expenses like utilities, transportation, and local amenities.
  • Plan for Future Costs: Factor in potential future expenses, such as the cost of upgrading or renovating a home, or the financial impact of a neighborhood’s rising property values.

By setting a clear budget and understanding the financial implications of different neighborhoods, you can make a more informed decision that aligns with your family’s financial health.

2. Evaluate Safety and Crime Rates

Safety is a top priority when choosing a neighborhood for your family. A safe environment is essential for peace of mind and overall well-being. To assess safety, consider the following:

  • Research Crime Statistics: Review local crime reports and statistics to understand the safety record of different neighborhoods. Websites like NeighborhoodScout and local police department reports can provide valuable information.
  • Visit the Area: Take the time to visit neighborhoods at different times of the day and night. Observe the overall atmosphere, talk to current residents, and get a sense of the community’s safety.
  • Check Local Safety Resources: Look for neighborhood watch programs, community policing initiatives, and other local safety resources that contribute to a secure environment.

A thorough evaluation of safety and crime rates will help you find a neighborhood where your family can feel secure and comfortable.

3. Assess Quality of Schools

For families with children, the quality of local schools is a critical factor in choosing the right neighborhood. A good education can have a lasting impact on your child’s development and future success. Consider these aspects when evaluating schools:

  • Research School Ratings: Look up school ratings and reviews from sources such as GreatSchools or Niche to gauge the performance of schools in different neighborhoods.
  • Visit Schools: Schedule visits to schools in the area to observe the facilities, meet with teachers, and understand the school environment.
  • Evaluate Educational Programs: Consider the availability of specialized programs, extracurricular activities, and support services that may benefit your child’s education.

Choosing a neighborhood with access to high-quality schools ensures that your children receive a strong education and have access to valuable learning opportunities.

4. Analyze Commute and Transportation Options

Convenience and accessibility are important considerations when selecting a neighborhood. Assessing commute times and transportation options can help you find a location that suits your family’s daily routines and activities. Here’s how to evaluate transportation:

  • Evaluate Commute Times: Consider the distance and time it takes to commute to work, school, and other regular destinations. A shorter commute can reduce stress and increase family time.
  • Explore Public Transportation: Check the availability and reliability of public transportation options, such as buses and trains, if you rely on them for commuting or running errands.
  • Assess Traffic Patterns: Research traffic patterns and congestion in different neighborhoods. A neighborhood with manageable traffic can improve daily convenience and reduce travel time.

Choosing a neighborhood with convenient transportation options and manageable commute times enhances your family’s overall quality of life.

5. Examine Local Amenities and Services

Local amenities and services contribute to the convenience and enjoyment of living in a neighborhood. Consider what amenities are important to your family and evaluate neighborhoods based on their offerings:

  • Proximity to Parks and Recreation: Access to parks, playgrounds, and recreational facilities is important for families with children. Look for neighborhoods with nearby green spaces and recreational opportunities.
  • Availability of Shops and Services: Evaluate the proximity of essential services such as grocery stores, medical facilities, and banking services. Easy access to these services can save time and effort.
  • Community Features: Consider the availability of community centers, libraries, and cultural activities that contribute to a vibrant and engaging neighborhood.

A neighborhood with ample amenities and services can enhance your family’s daily life and overall satisfaction.

6. Consider Neighborhood Demographics and Community

Understanding the demographics and community atmosphere of a neighborhood can help you find a place where your family feels comfortable and connected. Here’s how to assess the community:

  • Research Demographics: Look into the age range, family structure, and cultural diversity of the neighborhood. Choose a community that aligns with your family’s values and preferences.
  • Attend Community Events: Participate in local events and gatherings to get a sense of the community’s social dynamics and engage with residents.
  • Assess Community Involvement: Consider the level of community involvement and activism. A strong sense of community can contribute to a supportive and welcoming environment.

Choosing a neighborhood with a positive and inclusive community atmosphere fosters a sense of belonging and connection for your family.

7. Review Housing Options and Property Values

The availability and quality of housing options are key factors in selecting the right neighborhood. Assessing property values and housing options can help you find a suitable home that meets your family’s needs:

  • Explore Housing Types: Consider the types of homes available in different neighborhoods, such as single-family houses, townhouses, or apartments. Choose a housing type that fits your family’s lifestyle and preferences.
  • Check Property Values: Research property values and trends in the area to ensure that you’re investing in a neighborhood with stable or appreciating property values.
  • Evaluate Neighborhood Growth: Look into the neighborhood’s growth potential and development plans. A neighborhood with future growth prospects may offer long-term benefits.

Finding a neighborhood with housing options that suit your family’s needs and budget ensures a comfortable and satisfying living experience.

8. Assess the Neighborhood’s Future Development

Understanding the future development plans for a neighborhood can provide insight into its potential for growth and changes. Consider these aspects when evaluating future development:

  • Review Zoning Laws: Research local zoning laws and development regulations to understand what types of changes are allowed in the neighborhood.
  • Explore Development Plans: Look into any planned infrastructure projects, commercial developments, or residential expansions that may impact the neighborhood.
  • Consider Impact on Property Values: Evaluate how future development may affect property values and the overall character of the neighborhood.

Choosing a neighborhood with a positive outlook for future development can offer long-term benefits and enhance your family’s living experience.

9. Evaluate Noise Levels and Environmental Factors

Noise levels and environmental factors can significantly impact your family’s comfort and well-being. Assess these aspects to ensure a peaceful and pleasant living environment:

  • Check Noise Levels: Evaluate the noise levels in the neighborhood, including traffic, construction, and other sources of noise. A quieter environment contributes to a more relaxed living experience.
  • Consider Environmental Factors: Assess environmental factors such as air quality, proximity to industrial areas, and green spaces. A healthy environment promotes overall well-being.
  • Review Local Climate: Consider the local climate and weather conditions. Choose a neighborhood with a climate that suits your family’s preferences and lifestyle.

A neighborhood with favorable noise levels and environmental conditions enhances your family’s quality of life and comfort.

10. Trust Your Instincts and Preferences

Ultimately, choosing the best neighborhood for your family involves trusting your instincts and personal preferences. While research and analysis are essential, your family’s unique needs and desires should guide your decision. Consider these personal factors:

  • Family Preferences: Reflect on your family’s preferences for lifestyle, community atmosphere, and amenities. Choose a neighborhood that aligns with your family’s values and priorities.
  • Emotional Connection: Pay attention to how you and your family feel about different neighborhoods. An emotional connection to a community can enhance your overall satisfaction and sense of belonging.
  • Family Involvement: Involve your family in the decision-making process to ensure that everyone’s needs and preferences are considered.

Trusting your instincts and preferences ensures that you find a neighborhood where your family will thrive and feel at home.

Conclusion

Choosing the best neighborhood for your family is a multifaceted decision that involves evaluating factors such as budget, safety, schools, transportation, amenities, and community atmosphere. By considering these factors and conducting thorough research, you can find a neighborhood that meets your family’s needs and enhances your overall quality of life. Whether you’re relocating to a new city or seeking a better fit within your current area, making an informed choice will ensure a comfortable and fulfilling living experience for you and your loved ones.

The Benefits of Installing a Drip Irrigation System

0

In the realm of efficient water management for gardening and agriculture, drip irrigation systems have emerged as one of the most effective and eco-friendly solutions. Unlike traditional irrigation methods, which can waste significant amounts of water through evaporation and runoff, drip irrigation delivers water directly to the roots of plants. This targeted approach not only conserves water but also promotes healthier plant growth. In this article, we’ll explore the numerous benefits of installing a drip irrigation system and why it might be the right choice for your garden or agricultural operation.

1. Water Efficiency and Conservation

One of the most significant advantages of drip irrigation is its exceptional water efficiency. Traditional irrigation methods, such as sprinklers and flood irrigation, often lead to considerable water loss due to evaporation, wind, and runoff. Drip irrigation addresses these issues by delivering water directly to the plant roots, minimizing waste. Here’s how drip irrigation conserves water:

  • Precision Delivery: Drip systems use a network of tubes and emitters to provide a slow, steady supply of water directly to the plant’s root zone. This method reduces evaporation and ensures that water is used efficiently.
  • Reduced Runoff: By applying water slowly and gradually, drip irrigation minimizes surface runoff, which can lead to erosion and the loss of valuable soil nutrients.
  • Water on Demand: Drip systems can be programmed to deliver water at specific times and quantities, allowing for precise control over water usage and reducing the risk of overwatering.

In arid regions or areas facing water shortages, drip irrigation is an invaluable tool for conserving this precious resource.

2. Improved Plant Health and Growth

Drip irrigation not only conserves water but also enhances plant health and growth. By providing a consistent and targeted supply of moisture, plants can thrive in their optimal growing conditions. Here’s how drip irrigation contributes to healthier plants:

  • Reduced Disease Risk: Overhead watering can lead to waterlogged soil and promote the growth of fungal diseases. Drip irrigation minimizes water contact with plant foliage, reducing the risk of diseases and promoting healthier plants.
  • Enhanced Root Development: Delivering water directly to the root zone encourages deep and vigorous root growth. This improves the plant’s ability to access nutrients and water from the soil, leading to stronger and more resilient plants.
  • Uniform Growth: Drip irrigation ensures that each plant receives the same amount of water, promoting uniform growth and reducing competition for resources.

With healthier plants, you’ll enjoy a more vibrant and productive garden or agricultural operation.

3. Increased Efficiency and Reduced Labor

Drip irrigation systems are designed to be efficient and low-maintenance, which can significantly reduce the time and effort required to manage your garden or farm. Here’s how drip irrigation improves efficiency and reduces labor:

  • Automation: Drip irrigation systems can be automated with timers and sensors, allowing you to set specific watering schedules and durations. This eliminates the need for manual watering and ensures consistent moisture levels.
  • Less Manual Labor: With a drip system in place, there’s no need for frequent hand watering or moving sprinklers around. This saves time and reduces the physical effort required to maintain your garden or crops.
  • Reduced Weeding: By delivering water directly to the plants, drip irrigation helps keep weeds at bay. Weeds often thrive in moist conditions, but with targeted watering, you can reduce weed growth and competition for resources.

Overall, drip irrigation simplifies garden and farm maintenance, making it easier to manage your plants and crops efficiently.

4. Cost Savings

While the initial installation cost of a drip irrigation system may seem higher than traditional methods, it can lead to substantial long-term savings. Here’s how drip irrigation can be cost-effective:

  • Water Savings: By using water more efficiently, drip irrigation reduces water bills, especially in areas with high water costs or during drought conditions. The precision of drip irrigation ensures that water is used only where and when it is needed.
  • Reduced Fertilizer Use: Drip systems can be equipped with fertigation capabilities, allowing you to deliver nutrients directly to the plants along with water. This targeted approach reduces fertilizer waste and can lower the overall cost of fertilization.
  • Lower Energy Costs: Drip irrigation systems typically require less pressure and energy to operate compared to traditional sprinkler systems. This can result in lower energy costs for pumping and delivering water.

The cost savings associated with drip irrigation can quickly offset the initial investment, making it a financially viable option for many gardeners and farmers.

5. Flexibility and Versatility

Drip irrigation systems are highly versatile and can be adapted to a wide range of applications. Whether you have a small garden, a large farm, or a commercial operation, drip irrigation can be customized to meet your specific needs. Here’s how drip irrigation offers flexibility:

  • Customizable Layouts: Drip irrigation systems can be tailored to fit various garden shapes and sizes. You can design the system to accommodate different plant types, row crops, or landscape features.
  • Suitable for Diverse Plants: Drip irrigation works well for a wide variety of plants, including vegetables, fruits, flowers, and shrubs. You can adjust the emitters and flow rates to provide the appropriate amount of water for different plant species.
  • Scalability: Drip systems can be expanded or modified as your needs change. Whether you’re adding new plants or increasing the size of your garden, you can easily adjust the system to accommodate your growing requirements.

The adaptability of drip irrigation makes it a practical choice for both small-scale and large-scale applications.

6. Environmental Benefits

Drip irrigation is an environmentally friendly option that supports sustainable gardening and farming practices. Here’s how drip irrigation contributes to environmental conservation:

  • Reduced Water Waste: By delivering water directly to the roots, drip irrigation minimizes waste and helps conserve valuable water resources. This is particularly important in regions where water scarcity is a concern.
  • Minimized Soil Erosion: Traditional irrigation methods can cause soil erosion due to surface runoff. Drip irrigation reduces runoff and helps maintain soil structure, preventing erosion and preserving soil fertility.
  • Lower Chemical Usage: With the ability to deliver nutrients precisely where they are needed, drip irrigation reduces the need for excessive chemical fertilizers and pesticides. This minimizes environmental pollution and promotes healthier ecosystems.

By choosing drip irrigation, you’re contributing to more sustainable and eco-friendly gardening and farming practices.

7. Easy Installation and Maintenance

Drip irrigation systems are relatively easy to install and maintain, making them accessible for both DIY enthusiasts and professional landscapers. Here’s why drip irrigation is user-friendly:

  • Simple Installation: Drip irrigation systems come with user-friendly components and detailed instructions, allowing for straightforward installation. Many systems are designed for easy setup, even for those with limited plumbing experience.
  • Low Maintenance: Once installed, drip irrigation systems require minimal maintenance. Regular checks for clogs, leaks, and system performance are typically all that’s needed to keep the system running smoothly.
  • Modular Design: Drip irrigation components are modular and can be easily replaced or upgraded as needed. This makes it simple to address any issues or make improvements over time.

The ease of installation and maintenance ensures that you can enjoy the benefits of drip irrigation without a significant time investment.

8. Enhanced Plant Growth and Yields

For farmers and gardeners focused on maximizing productivity, drip irrigation offers the potential for increased plant growth and yields. Here’s how drip irrigation supports optimal plant performance:

  • Consistent Moisture Levels: Drip systems provide a steady and reliable supply of water, which is crucial for plant growth and development. Consistent moisture levels contribute to better plant health and higher yields.
  • Optimized Nutrient Delivery: With fertigation capabilities, drip irrigation allows for the precise application of fertilizers and nutrients. This enhances nutrient uptake and improves overall plant performance.
  • Reduced Stress: Plants experiencing fluctuating water levels can become stressed, affecting their growth and productivity. Drip irrigation minimizes water stress, promoting stronger and more productive plants.

By supporting optimal growing conditions, drip irrigation can lead to healthier plants and improved crop yields.

Conclusion

Installing a drip irrigation system offers numerous benefits, including water efficiency, improved plant health, cost savings, and environmental conservation. Whether you’re a home gardener looking to enhance your garden or a farmer aiming to boost crop yields, drip irrigation provides a practical and effective solution. Its ability to deliver targeted water directly to the roots of plants not only conserves water but also promotes healthier growth and reduces the need for excessive maintenance.

How to Handle a Clogged Drain Without Damaging Your Pipes

0

Clogged drains are a common household issue that can be both frustrating and inconvenient. Whether it’s a slow-draining sink, a backed-up shower, or a clogged toilet, blockages can disrupt your daily routine and potentially lead to more severe plumbing problems if not addressed promptly. While it may be tempting to reach for a chemical drain cleaner or start plunging away, these methods can sometimes do more harm than good, potentially damaging your pipes. Fortunately, there are safe and effective ways to handle a clogged drain without causing damage. In this article, we’ll explore some of the best methods to clear a clogged drain and maintain your plumbing system in top condition.

1. Identify the Type of Clog

Before you begin any unclogging efforts, it’s essential to understand what type of clog you’re dealing with. Different types of clogs require different approaches, and using the wrong method could cause damage to your pipes. Here are some common types of clogs:

  • Hair and Soap Scum: These clogs typically occur in bathroom drains and are caused by hair, soap residue, and other debris building up over time.
  • Food Particles and Grease: Kitchen sink clogs often result from food particles, grease, and oil being washed down the drain, leading to blockages in the pipes.
  • Foreign Objects: Items such as small toys, jewelry, or sanitary products can accidentally be flushed down toilets or drains, causing blockages.
  • Mineral Buildup: Hard water can lead to mineral deposits in pipes, gradually narrowing the space for water flow and causing clogs.

2. Use a Plunger

A plunger is one of the most effective and least invasive tools for clearing clogged drains. It’s a simple device that uses suction to dislodge blockages. Here’s how to use a plunger correctly:

  1. Choose the Right Plunger: Use a cup plunger for sinks and a flange plunger for toilets. The flange plunger has a rubber extension that fits into the toilet drain for a better seal.
  2. Create a Seal: Place the plunger over the drain opening, ensuring it covers the entire opening. If you’re working on a sink, block the overflow hole with a wet cloth to create better suction.
  3. Plunge Vigorously: Push the plunger up and down with quick, forceful movements. The suction created by the plunger can help dislodge the clog.
  4. Test the Drain: After several plunges, remove the plunger and see if the water drains. If it does, run hot water to flush out any remaining debris.

Using a plunger is safe for your pipes and effective for many types of clogs, especially in sinks, showers, and toilets.

3. Try a Drain Snake (Plumbing Auger)

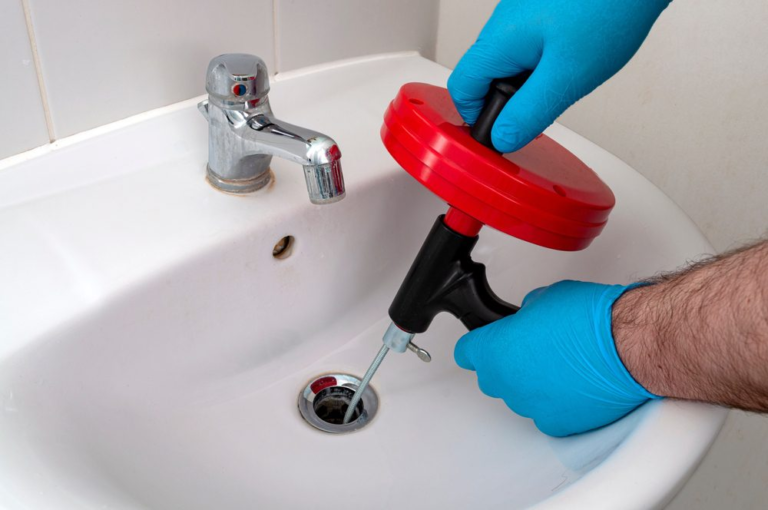
For clogs that are deeper in the pipes and can’t be cleared with a plunger, a drain snake, also known as a plumbing auger, is a more effective tool. Drain snakes are flexible cables that can navigate through pipes to reach and remove blockages. Here’s how to use one:

  1. Insert the Snake: Push the end of the drain snake into the drain opening. Turn the handle clockwise to extend the cable into the pipe.
  2. Reach the Clog: Continue feeding the snake into the pipe until you feel resistance. This resistance indicates that you’ve reached the clog.
  3. Break Up the Clog: Turn the snake’s handle to break up the clog. The twisting motion helps the cable latch onto the clog or dislodge it.
  4. Remove the Snake: Once the clog is cleared, carefully pull the snake out of the drain, cleaning it as you go to avoid bringing debris into the room.

Drain snakes are highly effective for clearing hair clogs in showers and bathtubs and can also handle more severe clogs in toilets and kitchen sinks. They are gentle on pipes and don’t pose a risk of damage when used correctly.

4. Use a Baking Soda and Vinegar Solution

If you prefer a natural and chemical-free method, a mixture of baking soda and vinegar can be an effective solution for minor clogs and routine maintenance. Here’s how to use this method:

  1. Pour Baking Soda: Pour one cup of baking soda down the clogged drain.
  2. Add Vinegar: Follow with one cup of white vinegar. The chemical reaction between baking soda and vinegar will create fizzing and bubbling that can help break down the clog.
  3. Let it Sit: Allow the mixture to sit in the drain for about 15-30 minutes. The reaction helps dissolve grease, soap scum, and other buildup.
  4. Flush with Hot Water: After the waiting period, pour a pot of boiling water down the drain to flush out the loosened debris.

This method is safe for all types of pipes and can effectively clear minor clogs. It’s also a great preventative measure to keep drains clear.

5. Use Hot Water and Dish Soap for Grease Clogs

Grease clogs in kitchen sinks can often be cleared with hot water and dish soap. The heat from the water melts the grease, while the soap helps dissolve and carry it away. Here’s how to use this method:

  1. Boil Water: Heat a pot of water until it reaches a boil.
  2. Add Dish Soap: Pour a generous amount of dish soap directly into the drain.
  3. Pour Hot Water: Slowly pour the boiling water down the drain, allowing it to melt and flush away the grease.

Repeat this process if necessary. This method is safe and effective for clearing grease clogs and preventing future buildup.

6. Avoid Chemical Drain Cleaners

While chemical drain cleaners are widely available and promise quick results, they should be used with caution. These cleaners contain harsh chemicals that can cause damage to your pipes, especially if used frequently or improperly. Here’s why you should avoid chemical drain cleaners:

  • Pipe Damage: The corrosive nature of chemical cleaners can weaken pipes, especially older ones made of metal or plastic, leading to leaks or even burst pipes.
  • Health Hazards: The fumes from chemical cleaners can be harmful to your health, causing respiratory issues and skin irritation.
  • Environmental Impact: Chemical cleaners can harm the environment by contaminating water supplies and harming aquatic life.

If you choose to use a chemical cleaner, follow the instructions carefully and use it sparingly. Always wear gloves and ensure proper ventilation to minimize exposure.

7. Prevent Clogs with Regular Maintenance

Prevention is the best way to avoid clogged drains and the potential damage they can cause. Here are some tips to help maintain clear drains:

  • Use Drain Covers: Install drain covers in sinks and showers to catch hair, food particles, and debris before they enter the drain.
  • Dispose of Grease Properly: Never pour grease or oil down the drain. Instead, let it solidify and dispose of it in the trash.
  • Flush Drains Regularly: Flush your drains with hot water once a week to help dissolve and wash away buildup.
  • Use Baking Soda and Vinegar: Once a month, use the baking soda and vinegar method to clean and deodorize your drains.
  • Be Mindful of What You Flush: Only flush toilet paper and human waste down the toilet. Avoid flushing items like wipes, feminine hygiene products, and cotton balls.

8. Know When to Call a Professional Plumber

While many clogs can be handled with DIY methods, there are situations where professional help is necessary. Call a plumber if you encounter any of the following:

  • Persistent Clogs: If a clog keeps coming back despite your efforts, there may be a deeper issue in the plumbing system.
  • Multiple Clogged Drains: If multiple drains in your home are clogged simultaneously, it could indicate a problem with the main sewer line.
  • Strange Odors: Foul odors coming from your drains could signal a sewer backup or other serious issue.
  • Water Backing Up: If water is backing up into sinks, tubs, or toilets, it’s a sign of a severe blockage that requires professional attention.

A licensed plumber has the tools and expertise to diagnose and fix plumbing problems without causing damage to your pipes.

Conclusion

Dealing with a clogged drain can be a hassle, but using the right methods can prevent damage to your pipes and ensure your plumbing system remains in good working order. From using plungers and drain snakes to natural solutions like baking soda and vinegar, there are many effective ways to clear clogs safely. Regular maintenance and preventive measures can also go a long way in keeping your drains clear and functional. By avoiding harsh chemical cleaners and knowing when to call a professional, you can protect your plumbing and maintain a clean, efficient, and healthy home.

The Role of Technology in Modern Home Cleaning Services

0

The world of home cleaning services has undergone a remarkable transformation in recent years, thanks to the rapid advancements in technology. From automated vacuum cleaners to smart home integration, technology is reshaping how we approach cleanliness and hygiene in our living spaces. As more people seek convenient, efficient, and effective cleaning solutions, technology plays a crucial role in meeting these demands. In this article, we’ll explore how technology is revolutionizing modern home cleaning services and why it’s becoming an indispensable part of maintaining a clean and healthy home.

The Rise of Technology in Home Cleaning

The increasing reliance on technology in everyday life has naturally extended to home cleaning services. This shift is driven by several factors:

  1. Convenience: Technology makes cleaning easier and more manageable, especially for busy individuals or families with demanding schedules.
  2. Efficiency: Advanced cleaning tools and devices offer faster and more thorough cleaning, reducing the time and effort required.
  3. Health and Hygiene: Technological innovations in cleaning help eliminate allergens, bacteria, and viruses, promoting a healthier living environment.
  4. Sustainability: Many modern cleaning technologies are designed to be eco-friendly, using less water and fewer chemicals.

1. Robotic Vacuum Cleaners and Mops

One of the most popular technological innovations in home cleaning services is the robotic vacuum cleaner. These devices have become a staple in many households due to their convenience and efficiency. Here’s how they are making a difference:

  • Automated Cleaning: Robotic vacuum cleaners are designed to clean floors without human intervention. They can be programmed to operate at specific times, ensuring that floors are cleaned regularly.
  • Advanced Sensors: Equipped with sensors, these robots can navigate around furniture, avoid obstacles, and detect changes in floor surfaces, providing comprehensive cleaning.
  • Smart Mapping: Some robotic vacuums come with smart mapping technology, allowing them to create a floor plan of your home. This enables targeted cleaning of specific areas and prevents the robot from getting lost or stuck.
  • Mopping Functions: In addition to vacuuming, many robotic cleaners are now equipped with mopping functions, providing a complete floor-cleaning solution.

Brands like iRobot’s Roomba, Roborock, and Eufy are leading the market with innovative features that cater to different home environments and cleaning needs.

2. Smart Home Integration

The integration of cleaning devices with smart home systems has taken convenience to a new level. Smart home technology allows you to control and monitor cleaning devices remotely, enhancing the overall cleaning experience. Key features of smart home integration include:

  • Voice Control: Many cleaning devices can be controlled using voice commands through smart speakers like Amazon Echo and Google Home. For example, you can start or stop a robotic vacuum by simply saying, “Alexa, start the vacuum.”
  • Mobile Apps: Most modern cleaning devices come with companion mobile apps that allow you to control, schedule, and monitor cleaning tasks from your smartphone. You can receive notifications about the cleaning status, battery levels, and maintenance requirements.
  • Automation and Scheduling: Smart home systems enable you to set cleaning schedules and automate tasks based on specific triggers, such as time of day or activity in certain areas of the home.
  • Integration with Other Devices: Cleaning devices can be integrated with other smart home devices, such as security cameras and thermostats, to create a synchronized home environment. For example, a smart vacuum can start cleaning when the home security system detects that everyone has left the house.

This seamless integration not only enhances convenience but also improves the efficiency and effectiveness of home cleaning routines.

3. High-Efficiency Particulate Air (HEPA) Filters and Air Purifiers

Air quality is an essential aspect of home cleaning, and technology has made significant strides in this area. HEPA filters and air purifiers have become common in many households due to their ability to remove allergens, dust, and pollutants from the air. Here’s how they contribute to a cleaner home environment:

  • HEPA Filtration: HEPA filters are designed to capture 99.97% of particles as small as 0.3 microns. They are commonly used in vacuum cleaners and air purifiers to trap dust, pet dander, pollen, and other allergens.
  • Air Purifiers: Modern air purifiers use HEPA filters and additional technologies such as activated carbon filters and UV light to remove odors, smoke, bacteria, and viruses from the air. These devices improve indoor air quality, making the home environment healthier.
  • Smart Features: Many air purifiers come with smart features that allow you to monitor air quality in real-time and control the device remotely. Some models can even connect to smart home systems for automated operation based on air quality levels.

Brands like Dyson, Blueair, and Honeywell offer advanced air purification solutions that integrate seamlessly with modern smart homes.

4. Steam Cleaners and Sanitizing Technology

Steam cleaning has emerged as a popular method for deep cleaning and sanitizing surfaces. Using the power of high-temperature steam, these devices effectively kill germs, bacteria, and viruses without the need for harsh chemicals. Key benefits of steam cleaners include:

  • Chemical-Free Cleaning: Steam cleaners use water to produce steam, eliminating the need for chemical cleaning agents. This makes them a safe and eco-friendly option, especially for households with children and pets.
  • Versatility: Steam cleaners can be used on various surfaces, including floors, carpets, upholstery, kitchen appliances, and bathrooms, providing a comprehensive cleaning solution.
  • Deep Cleaning: The high temperature of steam penetrates surfaces, removing dirt, grime, and stains effectively.

In addition to steam cleaners, UV-C sanitizing technology is being incorporated into vacuum cleaners and other cleaning devices. UV-C light is known to kill bacteria and viruses on contact, adding an extra layer of hygiene.

5. Automated Window Cleaners

Cleaning windows is often considered a tedious and challenging task, especially for high-rise buildings. Automated window cleaners have emerged as a solution to this problem. These devices use suction technology to attach themselves to windows and clean them automatically. Features of automated window cleaners include:

  • Remote Control: Most window cleaning robots come with a remote control or smartphone app, allowing you to start, stop, and control the device easily.
  • Safety Features: Automated window cleaners are equipped with safety ropes and anti-fall sensors to prevent accidents and ensure safe operation.
  • Multi-Surface Cleaning: These devices can clean various types of glass surfaces, including framed and frameless windows, mirrors, and glass doors.

Brands like Hobot and Ecovacs offer efficient window cleaning robots that simplify this traditionally cumbersome task.

6. AI-Powered Cleaning Systems

Artificial Intelligence (AI) is making its way into home cleaning, offering more intelligent and adaptable cleaning solutions. AI-powered cleaning systems can learn from their environment, adapt to different floor types, and optimize cleaning paths for maximum efficiency. Key features of AI-powered cleaning systems include:

  • Learning Capabilities: AI algorithms allow cleaning devices to learn the layout of your home, avoiding obstacles and efficiently covering all areas.
  • Improved Navigation: AI-powered devices can recognize and avoid small objects, ensuring thorough cleaning without getting stuck or causing damage.
  • Personalization: AI technology enables cleaning devices to adapt to user preferences, such as cleaning frequency, specific areas to clean, and the time of day for cleaning.

AI integration is becoming more common in robotic vacuum cleaners and other automated cleaning devices, offering smarter and more effective cleaning solutions.

7. Smart Cleaning Tools for Professional Services

Technology is also transforming the professional home cleaning industry. Cleaning companies are adopting smart tools and equipment to enhance their services and provide better results for clients. Here’s how technology is being used in professional cleaning:

  • Automated Scheduling and Management: Professional cleaning services use software and mobile apps to manage appointments, track cleaning tasks, and communicate with clients, improving efficiency and customer satisfaction.
  • Advanced Cleaning Equipment: Commercial-grade robotic vacuum cleaners, steam cleaners, and floor scrubbers are used to provide deep cleaning services in homes and commercial properties.
  • Eco-Friendly Cleaning Solutions: Technology has enabled the development of eco-friendly cleaning solutions and equipment that reduce water and chemical usage, promoting sustainability.

Professional cleaning companies are leveraging technology to offer more reliable, efficient, and eco-friendly services, meeting the evolving needs of clients.

Conclusion

The role of technology in modern home cleaning services is undeniably transformative. From robotic vacuum cleaners and AI-powered systems to smart home integration and eco-friendly solutions, technological advancements are redefining how we clean and maintain our living spaces. These innovations offer unparalleled convenience, efficiency, and effectiveness, making it easier to keep homes clean and healthy.

How to Prevent Package Theft with Smart Security Solutions

0

In the age of online shopping, package theft has become a growing concern for homeowners and businesses alike. Known as “porch piracy,” this issue affects millions of people every year, leading to lost items, financial losses, and a sense of insecurity. Fortunately, smart security solutions can effectively deter package thieves and protect your deliveries. This article will guide you through the best smart security options available to prevent package theft, ensuring your purchases are safe and sound.

Why Package Theft is a Growing Problem

With the rise of e-commerce, the number of packages delivered to homes and businesses has skyrocketed. This surge has made unattended packages a prime target for thieves. Here’s why package theft is becoming increasingly common:

  1. Increased Online Shopping: More people are shopping online than ever before, especially during holiday seasons and sales events, resulting in a higher volume of unattended packages.
  2. Convenience for Thieves: Packages left on doorsteps or in mailrooms are easy targets, often in plain sight and easily accessible.
  3. Lack of Surveillance: Many homes and buildings lack adequate security measures, making it easy for thieves to grab packages without being noticed.
  4. Fast Grab and Go: Package theft is a quick crime that takes only seconds, making it difficult for law enforcement to catch the culprits.

Smart Security Solutions to Prevent Package Theft

To protect your deliveries and maintain peace of mind, investing in smart security solutions is essential. Here are some effective methods to prevent package theft using smart technology:

1. Install Smart Doorbell Cameras

Smart doorbell cameras are one of the most popular and effective tools for deterring package theft. These devices not only allow you to see who is at your door but also record video footage that can be used as evidence if theft occurs. Features of smart doorbell cameras include:

  • Real-Time Alerts: Receive instant notifications on your smartphone when someone approaches your door, allowing you to monitor activity even when you’re not home.
  • Two-Way Audio: Communicate with delivery drivers and visitors through your smartphone, instructing them on where to place packages or asking them to leave the premises.
  • Motion Detection: Built-in motion sensors trigger video recording when movement is detected, capturing potential thieves in the act.
  • Night Vision: Many smart doorbell cameras are equipped with night vision, ensuring clear footage even in low-light conditions.

Popular smart doorbell camera brands include Ring, Nest Hello, and Arlo. These devices are relatively easy to install and integrate with other smart home systems.

2. Use Smart Security Cameras

In addition to doorbell cameras, consider installing smart security cameras around your home’s exterior. These cameras can be placed at strategic locations, such as near entryways, driveways, and garages, providing comprehensive surveillance. Benefits of smart security cameras include:

  • Wide-Angle Viewing: Capture a broad area around your home, making it harder for thieves to approach unnoticed.
  • Cloud Storage: Store video footage in the cloud, allowing you to access and review it at any time.
  • Mobile Access: Monitor live feeds from your smartphone or tablet, keeping an eye on your property from anywhere.
  • Integration with Smart Systems: Many smart security cameras can be integrated with other smart home devices, such as smart locks and lighting, for a comprehensive security solution.

Brands like Blink, Wyze, and Eufy offer reliable smart security cameras that provide excellent video quality and user-friendly features.

3. Install Smart Locks

Smart locks are a great way to control access to your home and secure your deliveries. These locks can be programmed to allow delivery personnel access to your home or garage, ensuring packages are placed inside safely. Features of smart locks include:

  • Keyless Entry: Allow access through a smartphone app, key code, or biometric scan, eliminating the need for traditional keys.
  • Remote Access: Lock or unlock your doors remotely from your smartphone, allowing delivery drivers to place packages inside when you’re not home.
  • Temporary Codes: Generate temporary access codes for delivery personnel, which expire after a set time, enhancing security.
  • Integration with Smart Cameras: Pair smart locks with cameras to monitor who enters your home and when.

Brands like August, Schlage, and Yale offer a range of smart locks that are compatible with most standard door types and smart home systems.

4. Use Smart Package Delivery Boxes

Smart package delivery boxes provide a secure place for couriers to leave packages. These boxes can be placed on your porch or in another accessible location and are equipped with smart technology for enhanced security. Features of smart package delivery boxes include:

  • Secure Access: Boxes can be locked and unlocked using a smartphone app, ensuring only authorized individuals can access the contents.
  • Delivery Notifications: Receive alerts when a package is delivered and placed inside the box.
  • Tamper Alerts: If someone tries to force open the box, you’ll receive an instant notification.
  • Weatherproof Design: These boxes are designed to protect packages from the elements, keeping them dry and safe.

Brands like BoxLock, Parcel Guard, and iParcelBox offer smart delivery boxes with various features to suit different needs.

5. Implement Smart Lighting

Smart lighting can act as a powerful deterrent against package theft. Motion-activated lights or scheduled lighting can give the impression that someone is home, discouraging potential thieves. Here’s how smart lighting can enhance security:

  • Motion Sensors: Install smart lights with motion sensors around your porch, driveway, and yard. When motion is detected, the lights will turn on, startling thieves and drawing attention to their actions.
  • Automated Schedules: Program your lights to turn on and off at specific times, creating the illusion of occupancy.
  • Integration with Cameras: Pair smart lighting with security cameras to automatically illuminate areas when motion is detected, improving the quality of video footage.

Popular smart lighting brands include Philips Hue, LIFX, and Ring. These lights can be controlled via smartphone apps and integrated with other smart security devices.

6. Use Smart Alarms and Sensors

Smart alarms and sensors can provide an added layer of security to your home’s entry points and delivery areas. These devices alert you to potential threats, allowing you to respond quickly. Features of smart alarms and sensors include:

  • Door and Window Sensors: Detect when doors or windows are opened, sending alerts to your smartphone.
  • Glass Break Sensors: Trigger an alarm if a window is broken, alerting you and potentially scaring off intruders.
  • Motion Sensors: Place motion sensors in areas where packages are delivered to detect unauthorized access.
  • Siren Alerts: Some smart alarms come with built-in sirens that sound when a sensor is triggered, drawing attention and deterring thieves.

Brands like SimpliSafe, ADT, and Vivint offer comprehensive smart alarm systems that can be customized to fit your specific security needs.

7. Leverage Smart Home Hubs

Smart home hubs can integrate all your security devices into a single, cohesive system, allowing you to monitor and control everything from one place. Hubs like Amazon Echo, Google Nest Hub, and Samsung SmartThings enable seamless communication between your smart security devices, enhancing their effectiveness. Benefits of using a smart home hub include:

  • Centralized Control: Manage all your security devices through a single app, making it easier to monitor and respond to alerts.
  • Automation: Set up routines that automate security actions, such as turning on lights when a camera detects motion.
  • Voice Commands: Use voice commands to control your security system, adding convenience and accessibility.

8. Utilize Delivery Notifications and Tracking

Many delivery companies offer tracking services that provide real-time updates on the status of your packages. By using these services, you can better plan for package arrivals and ensure someone is home to receive them. Tips for using delivery notifications and tracking include:

  • Sign Up for Alerts: Opt in to receive email or text notifications for package deliveries, providing estimated delivery times.
  • Request Signature Confirmation: Require a signature upon delivery to prevent packages from being left unattended.
  • Schedule Deliveries: Use scheduling options to choose delivery times when you’re likely to be home.
  • Redirect Deliveries: If you’re not home, redirect packages to a secure location, such as a nearby pick-up point or a trusted neighbor’s house.

Conclusion

Package theft is a common problem, but with the right smart security solutions, you can protect your deliveries and deter thieves. From smart doorbell cameras and security cameras to smart locks, delivery boxes, and lighting, there are numerous options to enhance your home’s security. By integrating these devices into a cohesive system using a smart home hub, you can monitor and control your security from anywhere, ensuring peace of mind.

How to Maintain Your Home’s Insulation for Energy Efficiency

0

Maintaining your home’s insulation is crucial for energy efficiency, comfort, and cost savings. Proper insulation keeps your home warm in the winter and cool in the summer, reducing the need for excessive heating or cooling. Over time, insulation can deteriorate or become less effective, leading to higher energy bills and a less comfortable living environment. This article will guide you through the steps to maintain your home’s insulation, ensuring it remains effective and contributes to energy efficiency.

Why Insulation Maintenance is Important

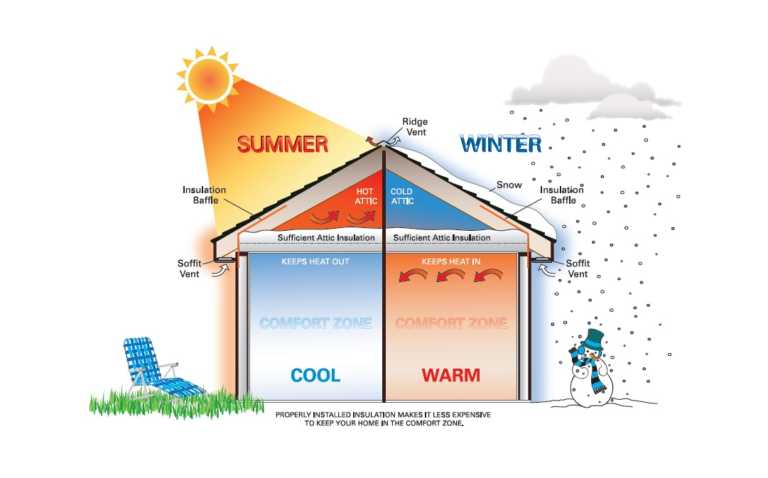
Insulation acts as a barrier to heat flow, helping to keep your home’s temperature stable. It prevents the escape of warm air during winter and keeps cool air inside during summer. Proper insulation maintenance is essential for several reasons:

  1. Energy Efficiency: Well-maintained insulation reduces the need for heating and cooling, leading to lower energy consumption and utility bills.
  2. Comfort: Insulation helps maintain a consistent indoor temperature, making your home more comfortable year-round.
  3. Environmental Impact: Reducing energy consumption by maintaining insulation minimizes your carbon footprint, contributing to environmental sustainability.
  4. Cost Savings: Efficient insulation lowers heating and cooling costs, saving you money on energy bills over time.

Types of Insulation and Common Issues

Understanding the types of insulation in your home can help you identify potential problems and maintenance needs. Common types of insulation include:

  1. Fiberglass Insulation: Typically found in batts or rolls, fiberglass is commonly used in attics, walls, and floors. It can lose effectiveness if it becomes wet or compressed.
  2. Foam Board Insulation: Made from polystyrene, polyurethane, or polyisocyanurate, foam board insulation is used in walls, foundations, and roofs. It can degrade over time or become damaged by pests.
  3. Spray Foam Insulation: This type of insulation expands upon application and is used to seal gaps and cracks. It can shrink or deteriorate if not applied correctly.
  4. Cellulose Insulation: Made from recycled paper treated for fire resistance, cellulose is often blown into attics and walls. It can settle over time, reducing its effectiveness.

Steps to Maintain Your Home’s Insulation

Regular maintenance of your home’s insulation can prolong its lifespan and maintain its effectiveness. Here’s a step-by-step guide to keeping your insulation in top condition:

1. Inspect Your Insulation Regularly

Routine inspections are essential to identify any problems early on. At least once a year, or more often if your home is older or in a region with extreme weather, inspect your insulation for signs of damage. Check for:

  • Moisture and Water Damage: Look for damp or wet spots, mold growth, or a musty odor. Water damage can reduce the insulating properties of materials like fiberglass and cellulose.
  • Pest Infestations: Inspect for signs of rodents or insects, such as droppings, nests, or chewed materials. Pests can damage insulation and create gaps that allow heat transfer.
  • Physical Damage: Look for compressed or flattened insulation, which can occur due to improper installation, foot traffic in attics, or storage.
  • Settling: Over time, blown-in insulation like cellulose may settle, reducing its effectiveness. Check the depth and consistency of insulation in attics and walls.

2. Seal Gaps and Cracks

Air leaks can significantly reduce the effectiveness of insulation, leading to energy loss. Check around windows, doors, electrical outlets, and other openings for gaps or cracks. Use caulking or weatherstripping to seal these areas and prevent drafts. In attics, ensure that any holes for wiring, pipes, or vents are sealed with foam sealant or caulking to prevent heat escape.

3. Replace Damaged Insulation

If you find any insulation that is wet, moldy, or heavily damaged, it should be replaced. Wet insulation not only loses its thermal resistance but can also lead to mold growth and structural damage. When replacing insulation, choose materials that are appropriate for your climate and location within the home. Consider using moisture-resistant materials in areas prone to dampness, such as basements and crawl spaces.

4. Upgrade Old Insulation

Older homes may have insulation that no longer meets current energy efficiency standards. If your home was built before the 1980s, consider upgrading the insulation. Modern materials offer better thermal performance and are often more environmentally friendly. Consult with an insulation professional to assess your home’s needs and recommend the best materials for your situation.

5. Add Insulation to Key Areas

Adding insulation to areas that are often overlooked can significantly improve energy efficiency. Key areas to consider include:

  • Attic: The attic is one of the primary sources of heat loss in a home. Ensure it has sufficient insulation, ideally with a minimum R-value (a measure of thermal resistance) recommended for your climate zone. Adding a radiant barrier can also reflect heat away, reducing cooling costs in the summer.
  • Walls: If your walls are poorly insulated, consider adding insulation. This may involve blowing in cellulose or foam insulation through small holes in the wall.
  • Crawl Spaces and Basements: Insulate crawl spaces and basements to prevent heat loss through the floor. Use moisture-resistant insulation to prevent mold growth.
  • Ductwork: Insulating ducts in unconditioned spaces, such as attics or basements, prevents heat loss or gain, improving the efficiency of your HVAC system.

6. Ventilate Properly

Proper ventilation works hand-in-hand with insulation to maintain energy efficiency. Ensure that attics and crawl spaces are adequately ventilated to prevent moisture buildup, which can damage insulation. Install soffit vents, ridge vents, or attic fans to improve air circulation and keep insulation dry.

7. Control Moisture Levels

Excess moisture can compromise the effectiveness of insulation. Use dehumidifiers in areas prone to high humidity, such as basements, to keep moisture levels in check. Ensure that your home’s exterior is well-maintained, with no leaks in the roof or walls. Install vapor barriers in crawl spaces and basements to prevent moisture from seeping into the insulation.

8. Regularly Maintain Your HVAC System

A well-maintained HVAC system works more efficiently and places less strain on your insulation. Replace air filters regularly, schedule annual maintenance checks, and keep vents and ducts clean. An efficient HVAC system complements your insulation, ensuring optimal energy use and comfort.

9. Use Smart Thermostats

Smart thermostats help manage your home’s heating and cooling more efficiently, reducing energy consumption. They can adjust temperatures based on occupancy and weather conditions, making sure your insulation and HVAC system work effectively together. By reducing the demand for heating and cooling, you extend the life of your insulation and save on energy costs.

10. Consult a Professional

If you’re unsure about the condition of your home’s insulation or need advice on improvements, consult a professional insulation contractor. They can perform a thorough inspection, provide recommendations, and ensure that any installation or replacement is done correctly. Professional guidance is particularly beneficial for identifying hidden air leaks, assessing moisture issues, and selecting the best insulation materials for your home.

Conclusion

Maintaining your home’s insulation is a vital part of ensuring energy efficiency, comfort, and cost savings. Regular inspections, sealing gaps, replacing damaged insulation, and upgrading outdated materials are essential steps in maintaining effective insulation. By paying attention to key areas like the attic, walls, crawl spaces, and basements, and by managing moisture and ventilation, you can significantly improve your home’s energy efficiency.

Not only does well-maintained insulation keep your home comfortable year-round, but it also reduces energy consumption and lowers your utility bills. Taking proactive steps to maintain your insulation helps protect your investment and contributes to a more sustainable, eco-friendly home. Whether you take on insulation maintenance as a DIY project or consult with a professional, the benefits of a well-insulated home are clear.

Keep your home cozy in the winter, cool in the summer, and energy-efficient all year long by giving your insulation the attention it needs. With regular maintenance and timely upgrades, your home will remain a comfortable, energy-efficient haven for years to come.

10 Inspiring Before-and-After Home Renovation Transformations

0

Home renovations can be a transformative journey, turning outdated spaces into stunning showcases of design and functionality. Whether you’re looking to enhance your home’s value, improve its aesthetics, or adapt it to your changing lifestyle needs, there’s something incredibly satisfying about seeing a space evolve from tired to terrific. Here are ten inspiring before-and-after home renovation transformations that show just what’s possible when creativity and craftsmanship come together.

1. From Drab to Fab: Living Room Makeover

Before: This living room was a dark, cluttered space with outdated furniture, heavy drapes, and a lack of natural light. The walls were painted a dull beige, making the room feel uninspired and cramped.

After: By choosing a light, neutral color palette and adding large, modern windows, the room was instantly brightened. The removal of heavy drapes allowed more natural light to flood in. The addition of a sleek, contemporary sectional sofa, complemented by minimalist shelving, provided functionality without the clutter. A statement rug added a pop of color, tying the room together.

2. Kitchen Revival: Outdated to Open-Concept

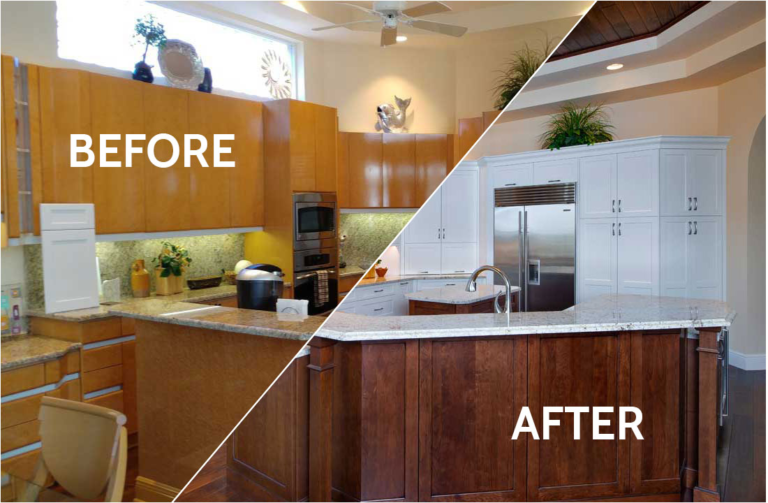
Before: This kitchen was closed off, with limited counter space and dark, dated cabinets. The layout was inefficient, making cooking and entertaining a challenge.

After: By knocking down a non-load-bearing wall, the kitchen was transformed into an open-concept space that flows seamlessly into the dining area. New white cabinetry, stainless steel appliances, and a large island with bar seating made this kitchen the heart of the home. A backsplash with subway tiles added a classic yet modern touch, while pendant lighting provided warmth and sophistication.

3. Bathroom Bliss: Small Space, Big Impact

Before: This small bathroom was cramped, with a dated vanity and a shower/tub combination that felt claustrophobic. The lack of storage space made it feel even more congested.

After: A walk-in shower replaced the tub, creating an illusion of more space. Frameless glass doors made the bathroom appear larger, while a floating vanity added to the sense of openness. The use of light colors, such as soft grays and whites, alongside a large mirror, further enhanced the airy feel. Small yet impactful details like stylish fixtures and a chic tile floor added personality and elegance.

4. Master Bedroom Retreat: From Bland to Beautiful

Before: This master bedroom was plain and uninspiring, with mismatched furniture and a lack of cohesion. The walls were bare, and the lighting was harsh, making the room feel more like a utility space than a cozy retreat.

After: A calming color palette of blues and grays, paired with white trim, created a serene environment. A feature wall with textured wallpaper added depth and interest. New lighting fixtures, including bedside lamps and a modern chandelier, offered a warm, inviting glow. A plush area rug, coordinated bedding, and thoughtfully chosen accessories completed this bedroom’s transformation into a tranquil retreat.

5. Basement Bonanza: From Unused Space to Family Room

Before: This basement was dark and underutilized, filled with storage boxes and outdated furniture. The low ceiling and poor lighting made it feel like an afterthought.

After: A complete overhaul included adding recessed lighting and brightening up the walls with a fresh coat of paint in a light, neutral shade. A new, comfortable sectional sofa created a cozy sitting area, while built-in shelving provided storage and display space. A large flat-screen TV made this basement the perfect family room for movie nights and casual gatherings. The addition of a small kitchenette area added functionality for snacks and drinks.

6. Curb Appeal Upgrade: From Plain to Pretty

Before: The exterior of this home was nondescript, with an overgrown lawn, outdated siding, and a front door that lacked character. The overall look was tired and neglected.

After: A new coat of paint on the siding and trim, along with the installation of stone veneer accents, gave the home a fresh and welcoming appearance. The front door was replaced with a stylish, modern option in a bold color, creating a focal point. Updated landscaping, including trimmed shrubs, colorful flowers, and a new walkway, enhanced the home’s curb appeal. A new porch railing and outdoor lighting added the finishing touches.

7. Home Office Haven: From Cluttered to Chic

Before: This home office was cluttered, with a mishmash of furniture that lacked functionality. The room felt cramped, and there was little natural light due to heavy window treatments.

After: By decluttering and choosing streamlined, functional furniture, the room was opened up. A modern desk with built-in storage kept the space organized, while a comfortable office chair provided ergonomic support. The addition of light curtains allowed more natural light to enter, creating a bright and airy workspace. Accent pieces like a stylish rug and framed artwork added personality and inspiration.

8. Attic Conversion: From Forgotten to Fabulous

Before: The attic was an unused storage space, with low ceilings, poor insulation, and little lighting. It was cluttered with boxes and unused furniture, making it feel unwelcoming and unusable.

After: Insulating the attic and installing new drywall transformed it into a comfortable, functional space. Skylights were added to bring in natural light, and the ceiling was raised where possible to create a sense of openness. This attic was transformed into a cozy guest bedroom with a small sitting area, perfect for visitors. The use of light colors and compact, multifunctional furniture maximized the space’s potential.

9. Dining Room Delight: From Dull to Dazzling

Before: The dining room was dark and uninviting, with outdated furniture and heavy drapes. The walls were painted in a dark, muted color, making the space feel closed off.

After: By choosing a light, fresh color palette and replacing the heavy drapes with light curtains, the room was instantly brightened. A new dining table and chairs with a modern design created a more sophisticated and welcoming atmosphere. A statement chandelier added elegance and warmth. The addition of a stylish area rug and a large mirror on one wall enhanced the room’s brightness and sense of space.

10. Outdoor Oasis: From Barren to Beautiful

Before: The backyard was barren, with overgrown grass, no seating area, and little visual appeal. It lacked functionality and comfort, making it an underutilized part of the home.

After: The addition of a patio with outdoor furniture created a comfortable seating area perfect for relaxing and entertaining. A pergola provided shade and architectural interest, while a fire pit added a cozy gathering spot for cooler evenings. Landscaping with native plants, shrubs, and flowers added color and texture. A small water feature provided a calming, serene element, making this backyard a true outdoor oasis.

Conclusion

These ten inspiring before-and-after home renovation transformations demonstrate the power of thoughtful design and quality craftsmanship. Whether it’s a complete kitchen overhaul, a simple bedroom update, or a major exterior makeover, each renovation shows how even the most outdated and underutilized spaces can be transformed into beautiful, functional areas that enhance the quality of life and increase property value.

The Best Materials for a Long-Lasting Roof

0

Choosing the right roofing material is crucial for homeowners and property developers alike. A roof not only protects the structure from environmental elements but also enhances the aesthetic appeal of a building. With so many options available, selecting the best material for a long-lasting roof can be overwhelming. This article explores various roofing materials, focusing on durability, longevity, and maintenance to help you make an informed decision.

1. Asphalt Shingles

Asphalt shingles are one of the most popular roofing materials in the United States, and for good reasons. They are affordable, versatile, and easy to install. Asphalt shingles come in a variety of colors and styles, making it easy to match them with any architectural design.

Longevity and Durability:

Asphalt shingles have a lifespan of 20-30 years, depending on the quality and installation. Architectural or laminated shingles offer greater durability compared to the basic 3-tab shingles, as they are thicker and designed to withstand harsher weather conditions. Asphalt shingles provide good resistance against wind, fire, and moderate impact, making them a reliable choice for many homeowners.

Maintenance:

Maintenance is relatively easy; damaged shingles can be replaced individually, reducing repair costs. Regular inspection for signs of wear and tear, such as cracking or curling, is recommended to ensure the roof remains in good condition.

2. Metal Roofing

Metal roofing is gaining popularity due to its exceptional durability, energy efficiency, and modern appearance. Available in materials like aluminum, steel, copper, and zinc, metal roofs can be installed in a variety of styles, including standing seam panels and metal shingles.

Longevity and Durability:

Metal roofs are known for their longevity, often lasting 40-70 years or more, depending on the material. They are highly resistant to wind, rain, snow, and fire, making them ideal for regions prone to extreme weather. Metal roofing does not corrode or crack, and it can withstand impact from debris, such as branches, making it a robust option for long-term use.

Maintenance:

Maintenance is minimal with metal roofing. Occasional checks for loose fasteners or screws, along with cleaning to remove debris, will keep a metal roof in good condition. Recoating with paint or sealant every few decades can enhance the roof’s appearance and extend its lifespan.

3. Clay and Concrete Tiles

Clay and concrete tiles have been used for centuries and are known for their classic aesthetic and durability. These tiles are often seen on Mediterranean, Spanish, or Southwestern-style homes, adding a timeless charm.

Longevity and Durability:

Clay and concrete tiles can last 50-100 years with proper care, making them one of the longest-lasting roofing materials. They are highly resistant to fire, rot, insects, and harsh weather conditions. The density of these tiles provides excellent thermal insulation, keeping homes cooler in hot climates and reducing energy costs.

Maintenance:

The main concern with clay and concrete tiles is their weight; they require a strong structural foundation to support them. Regular inspection is necessary to check for cracked or broken tiles, which can be replaced individually. Occasional cleaning to remove moss or mildew is also recommended to maintain the tiles’ appearance.

4. Slate Roofing

Slate is a natural stone material that offers unparalleled beauty and durability. Known for its elegant appearance, slate roofing is commonly found on historic and high-end properties.

Longevity and Durability:

Slate roofs can last over 100 years, making them one of the most durable roofing options available. They are fireproof, waterproof, and highly resistant to wind and impact damage. The natural properties of slate make it an excellent choice for longevity, even in harsh climates.

Maintenance:

While slate requires little maintenance, it is crucial to ensure proper installation by experienced professionals to avoid future issues. Regular inspection for broken or loose tiles is necessary, as slate can become brittle over time. Replacement of damaged tiles should be done carefully to preserve the roof’s integrity.

5. Wood Shingles and Shakes

Wood shingles and shakes offer a natural, rustic look that complements various architectural styles, from traditional to modern. Typically made from cedar, redwood, or pine, wood roofing provides a warm and unique aesthetic.

Longevity and Durability:

Wood shingles and shakes can last 30-50 years if properly maintained. Cedar is a popular choice due to its natural resistance to rot and insects. Wood roofing is suitable for moderate climates, as it can be susceptible to moisture and fire. Pressure-treated wood can enhance its durability and resistance to decay.

Maintenance:

Regular maintenance is essential for wood roofs to prevent moss, mildew, and insect infestations. Cleaning, sealing, and applying fire-retardant treatments will help prolong the life of a wood roof. Replacing damaged shingles or shakes promptly is crucial to prevent further deterioration.

6. Synthetic Roofing Materials

Advancements in technology have led to the development of synthetic roofing materials designed to mimic the appearance of traditional options like slate, wood, and clay. These materials are made from a combination of rubber, plastic, and other synthetics, offering durability and versatility.

Longevity and Durability:

Synthetic roofing materials can last 30-50 years, depending on the quality and type. They are engineered to withstand various weather conditions, including UV rays, wind, and impact. Synthetic roofs are lightweight, reducing the structural requirements for installation, and they often come with extensive warranties.

Maintenance:

Synthetic roofs require minimal maintenance compared to natural materials. Regular cleaning to remove debris and occasional inspection for damage are usually sufficient to keep them in good condition. Their resistance to fading and cracking makes them a low-maintenance and cost-effective option.

7. Solar Roofing

Solar roofing, also known as solar shingles or photovoltaic shingles, is a modern solution that combines energy generation with traditional roofing. These shingles not only protect the home but also generate electricity, reducing energy costs and environmental impact.

Longevity and Durability:

Solar roofing systems have a lifespan of 25-30 years, similar to traditional asphalt shingles. They are designed to withstand harsh weather conditions, including high winds, hail, and heavy snow. Solar shingles are also fire-resistant, adding to their durability.

Maintenance:

Maintenance for solar roofing is relatively straightforward. Regular cleaning to remove dust, dirt, and debris ensures optimal energy generation. Professional inspections every few years will help maintain the system’s performance and detect any issues early.

Conclusion

Choosing the best material for a long-lasting roof depends on various factors, including climate, architectural style, budget, and personal preferences. Asphalt shingles and metal roofing offer affordable and durable options for many homeowners. Clay, concrete, and slate provide exceptional longevity and aesthetic appeal for those willing to invest in high-end materials. Wood shingles and shakes offer a natural, rustic look but require more maintenance. Synthetic materials and solar roofing provide innovative solutions for modern needs.

No matter the choice, proper installation and regular maintenance are crucial to maximizing the lifespan and performance of any roofing material. Consulting with a roofing professional can help ensure the best choice for your specific requirements, providing peace of mind and long-term protection for your home.